

How to interact with components and queries using custom vanilla JavaScript code in ToolJet

My expertise lies in building interactive web applications on the client side. Primarily working with technologies like JavaScript, Next.js, TypeScript and Python.
I strongly believe in continuous learning and improving myself, so I try my best to learn in any situation possible, unfavorable or not. Beyond learning, I enjoy writing technical articles and creating projects that both inspire and benefit fellow developers.
Modern web applications today are made up of a series of components that allows us to write our applications in an adaptable and quicker way. This enables both technical and non-technical developers to create software projects more quickly and easily. Low code tools make it easier for developers to build code quickly by reducing the amount of time they spend hard-coding the application from absolute scratch.
This is where ToolJet comes in. It not only allows you to build applications faster, but also customize them further using vanilla JavaScript, which is what we’re going to be discussing in this article, but before we go further, you might be wondering what ToolJet is?
What is Tooljet?
Tooljet is an extensible low-code framework for building business applications. It allows you to build your apps with a drag-and-drop application builder, and pre-built UI components. In this article, I’ll walk you through the necessary steps on how to interact with components and queries using custom vanilla JavaScript code in ToolJet.
Step 1. Sign-up on ToolJet
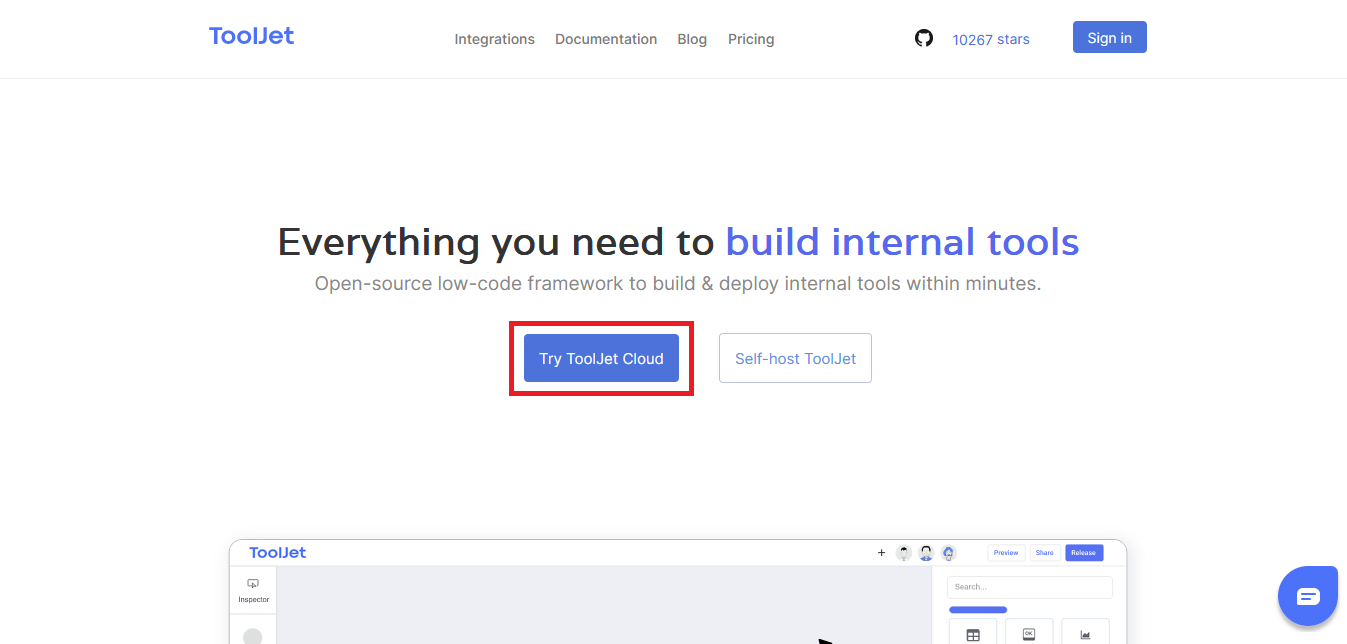
In other to create an app on tooljet, we need to sign up. Visit their website toolet.com, click the “Try ToolJet Cloud” button on the homepage and you’ll be navigated to the sign-up page where you have to input your email address.
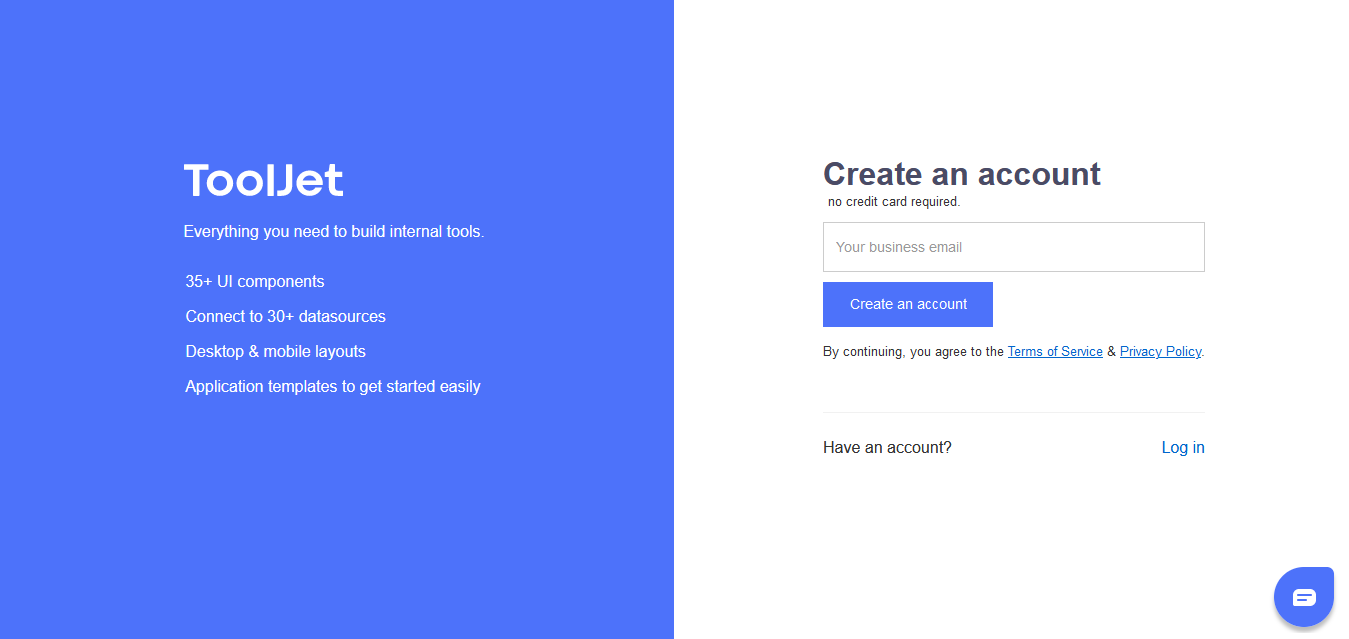
Add your preferred email address and click “Create an account”, a confirmation link will be sent to your mail immediately, visit the link to confirm your account.
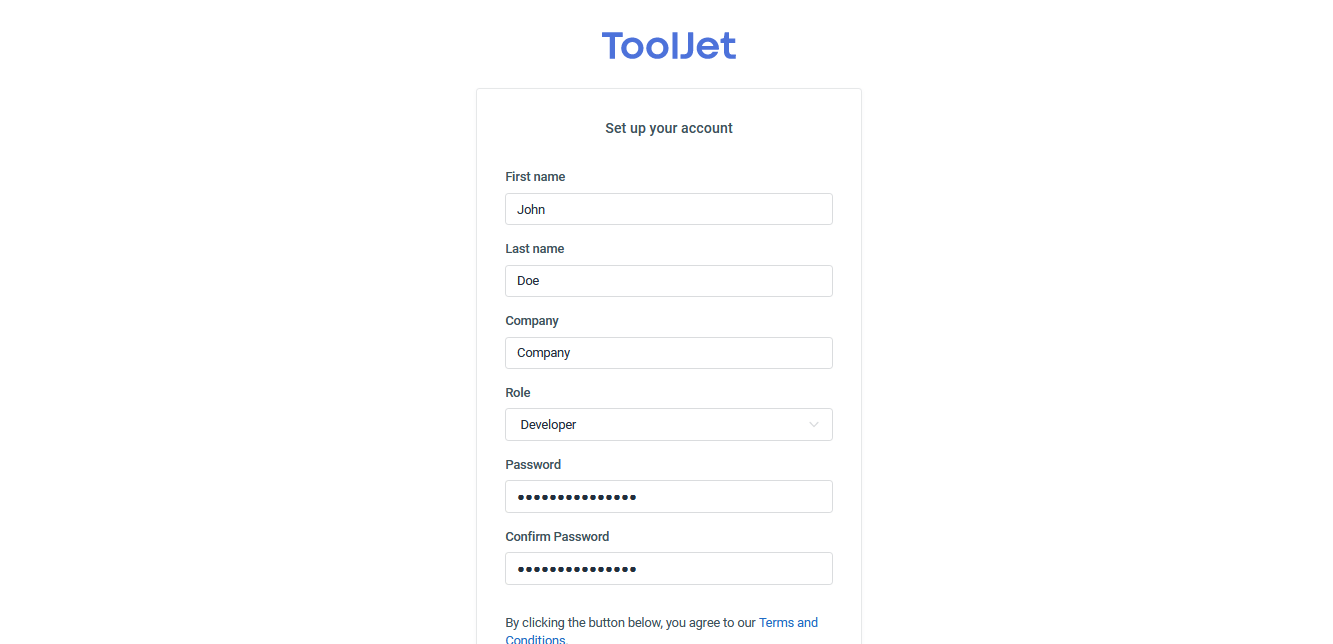
It will prompt another form for us to fill in our basic user information. Add your personal details and then click “Create account”. We have successfully created our account and can start working on projects.
Step 2. Create a new application
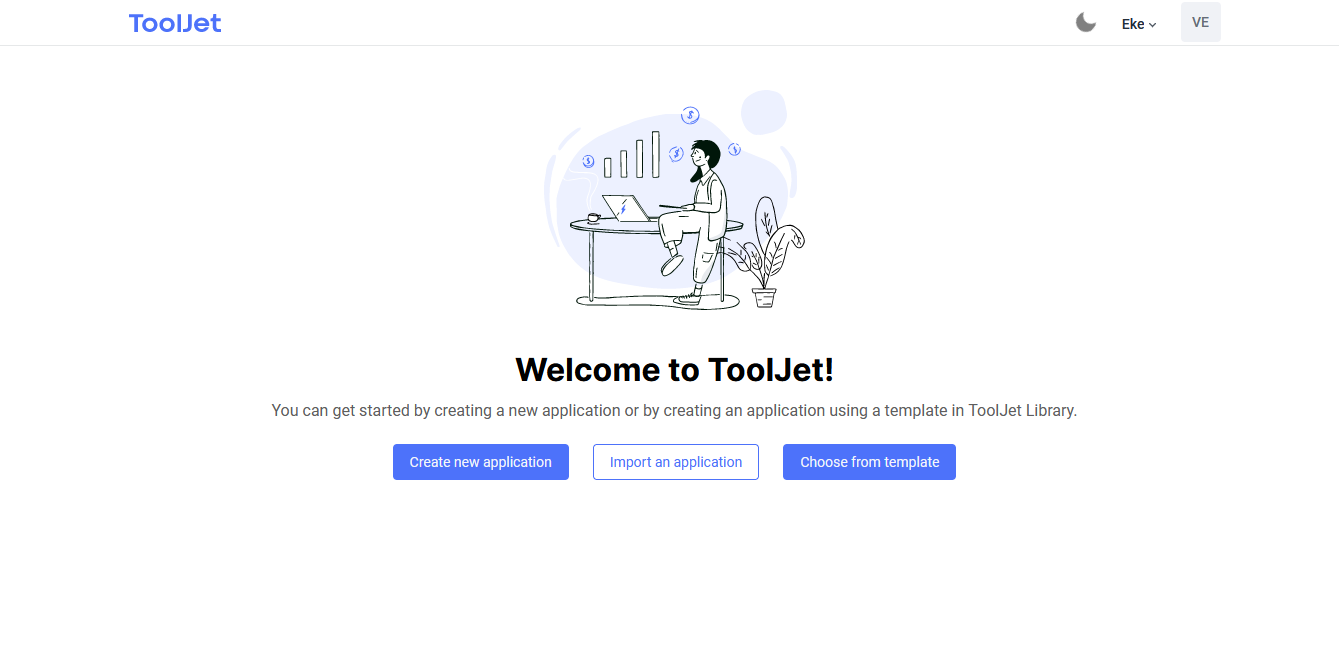
To create a new ToolJet app, click on the 'Create new application' button on the ToolJet dashboard, you will be redirected to the visual app editor once the app has been created.
A modal will display labeled v1, you can edit this or leave it as is, once decided, click create. By default, your app will be labeled “Untitled Project”, to rename it, click the name on the top-right menu of the dashboard, and edit it.
In this tutorial, we’ll be building a simple currency converter with custom JavaScript utilizing an API from Apilayer.

Step 3. Add Widget/Components
Components are like ready-made widgets that are customizable. On the right sidebar, you can see a list of built-in components that can be added to the app. You can also use the search functionality to quickly browse through the list.
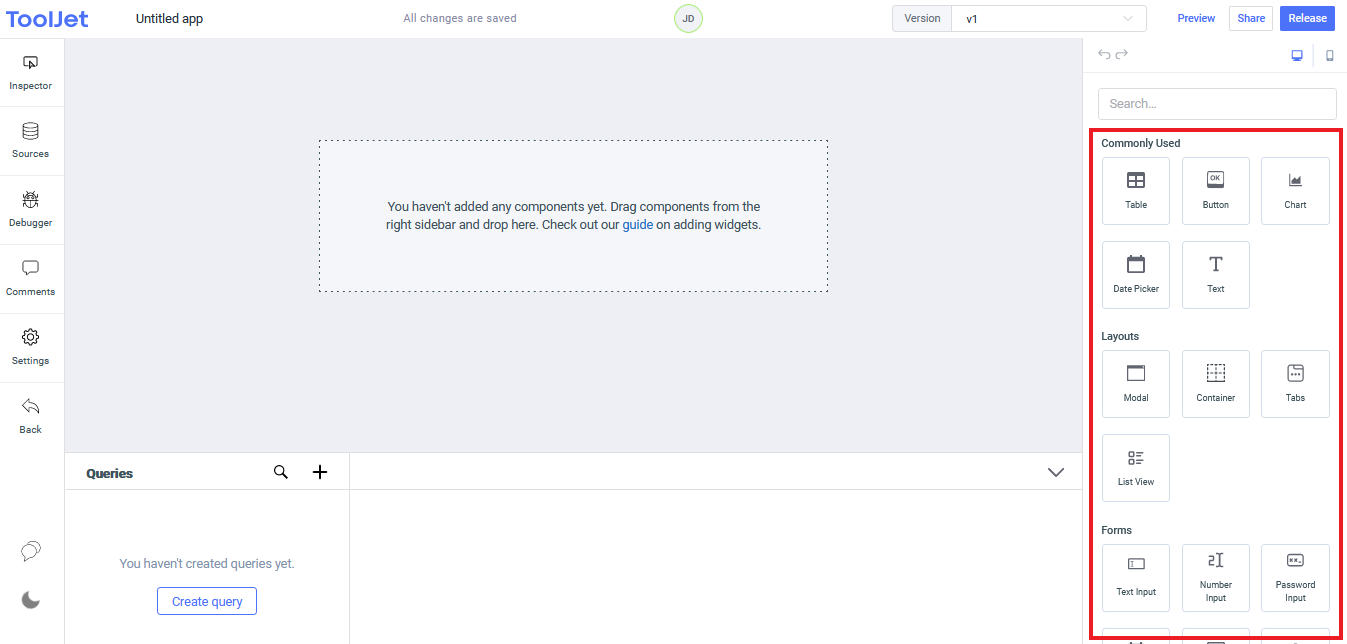
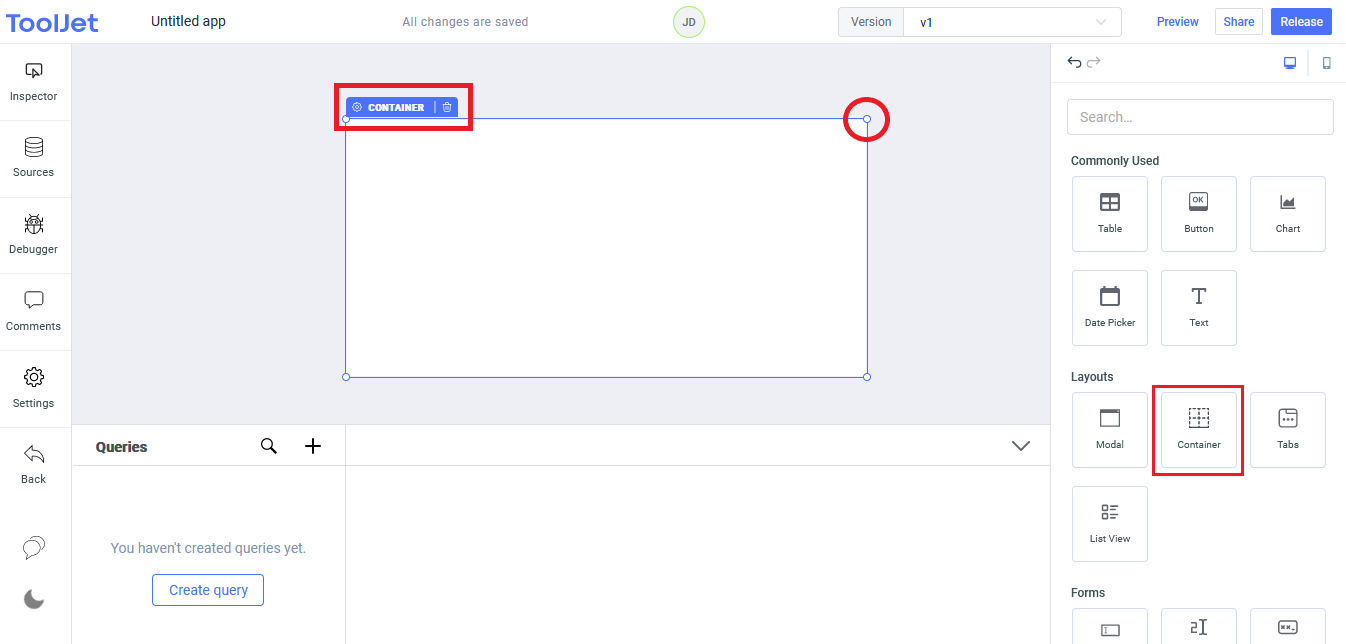
The first component we need is the container component to wrap all the content. To add a component, you drag and drop it on the canvas. You can also resize and style a component if you want. To delete a component, select it and click the trash icon close to the component label.
Add two text components, one for the base currency and the other for the foreign currency we’re converting to. Select the text component, and drag-and-drop it onto the canvas. On the properties menu, you can edit the text name with whatever you want.
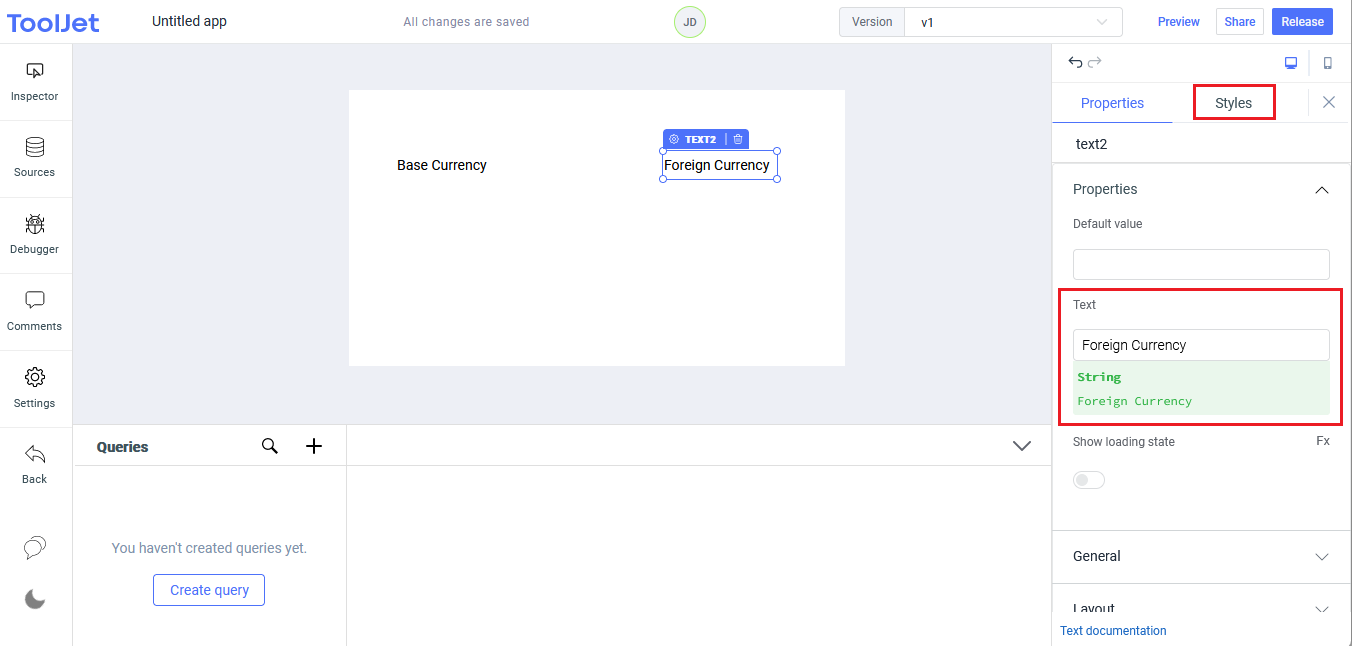
If you want to style the component, click on the Style tab to see a list of customizable features, each component has its own styling properties, from changing colors to text alignment to increasing the font size, and more.
How to interact with components and queries?
There are a few ways to interact with a component in ToolJet using custom JavaScript code. You can use an event handler that listens for an event, an executed query, etc, or you can target the component in the code using its class name, which is what we’ll be doing.
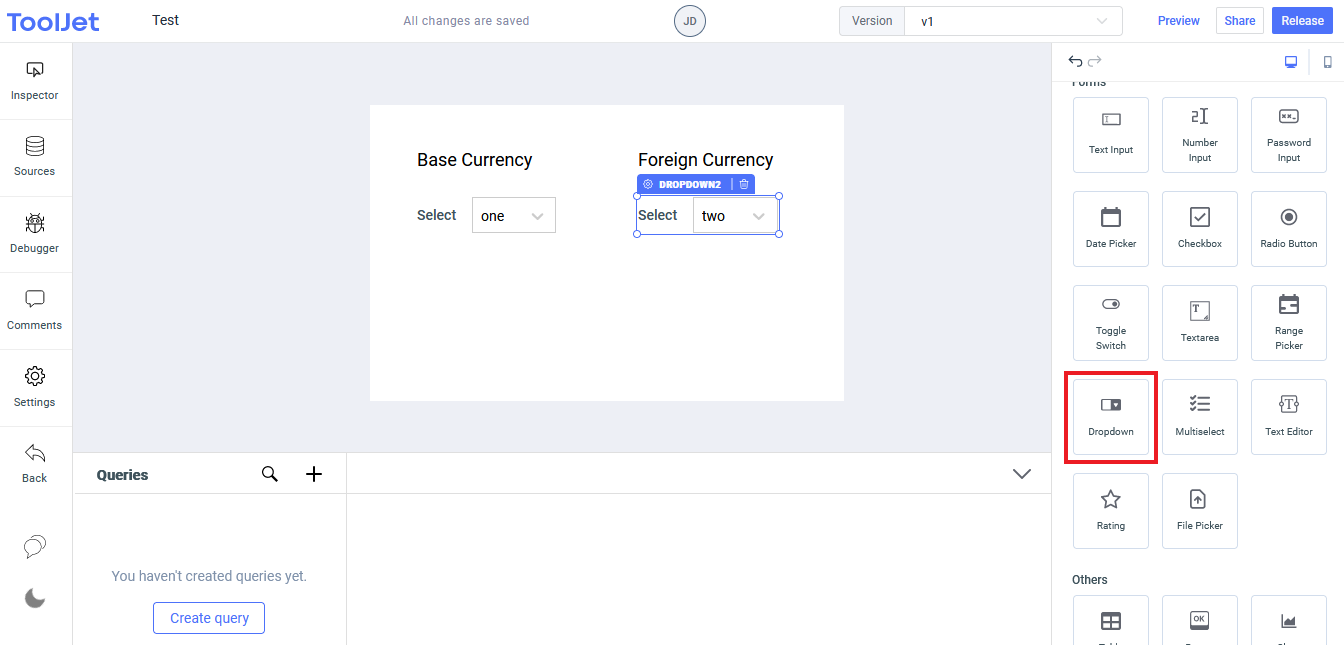
First let’s add two dropdown components, one for the base currency, and the other for the currency we are converting to. Let’s take a look at how to interact with these dropdown components up close.
- On the sidebar, the first property is the class name which is how we’ll be targeting the component in our JavaScript code. The first dropdown will be named
baseCurrencyand the otherforeignCurrency, later in our code, we can reference this component using like so.{{components.baseCurrency.value}}and{{components.foreignCurrency.value}}
Note: This class name is uppercase sensitive.
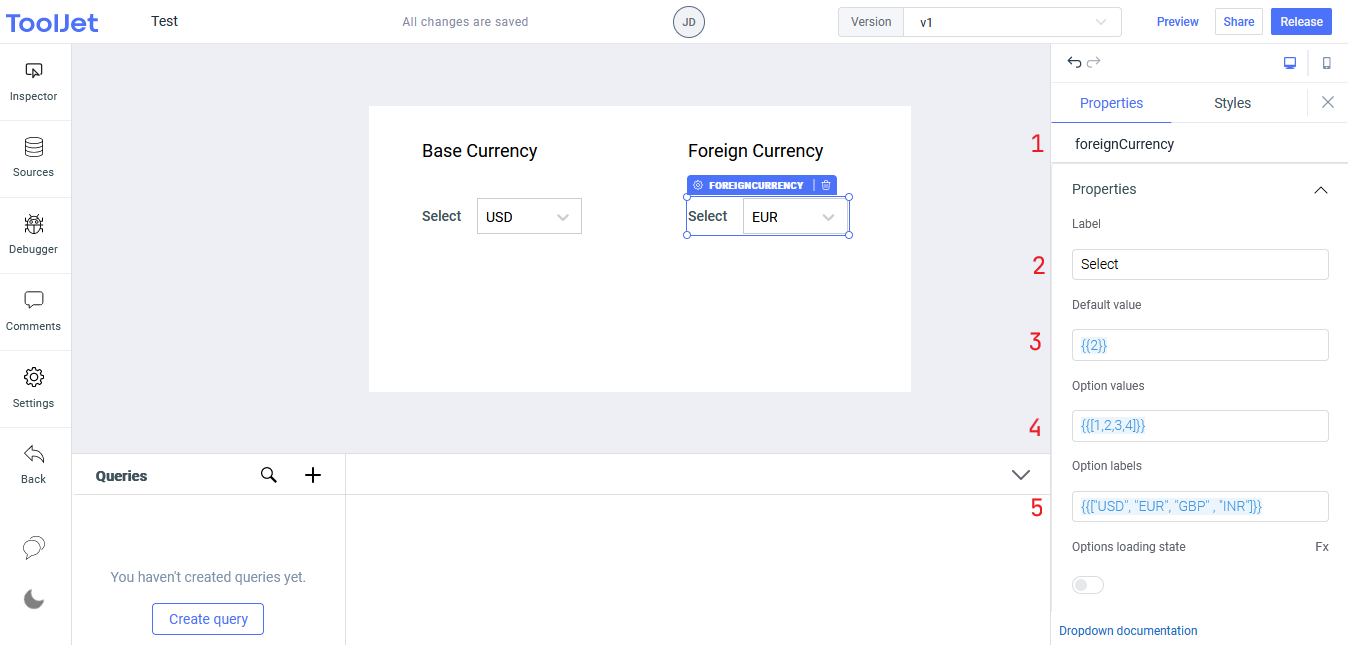
- By default, the label of a dropdown component is “select”, you can rename it, I’ll be leaving this as is.
- The default value uses numbers or a string to highlight the dropdown option you want to show by default.
- The option values are an array of comma-separated numbers or strings that controls the total number of values in the dropdown list. In this example, since we have four options, the number will be
[1, 2, 3, 4] - On the option labels, we’ll have an array of objects containing the shortcode for the currencies.
{{["USD", "EUR", "INR", "GBP"]}}
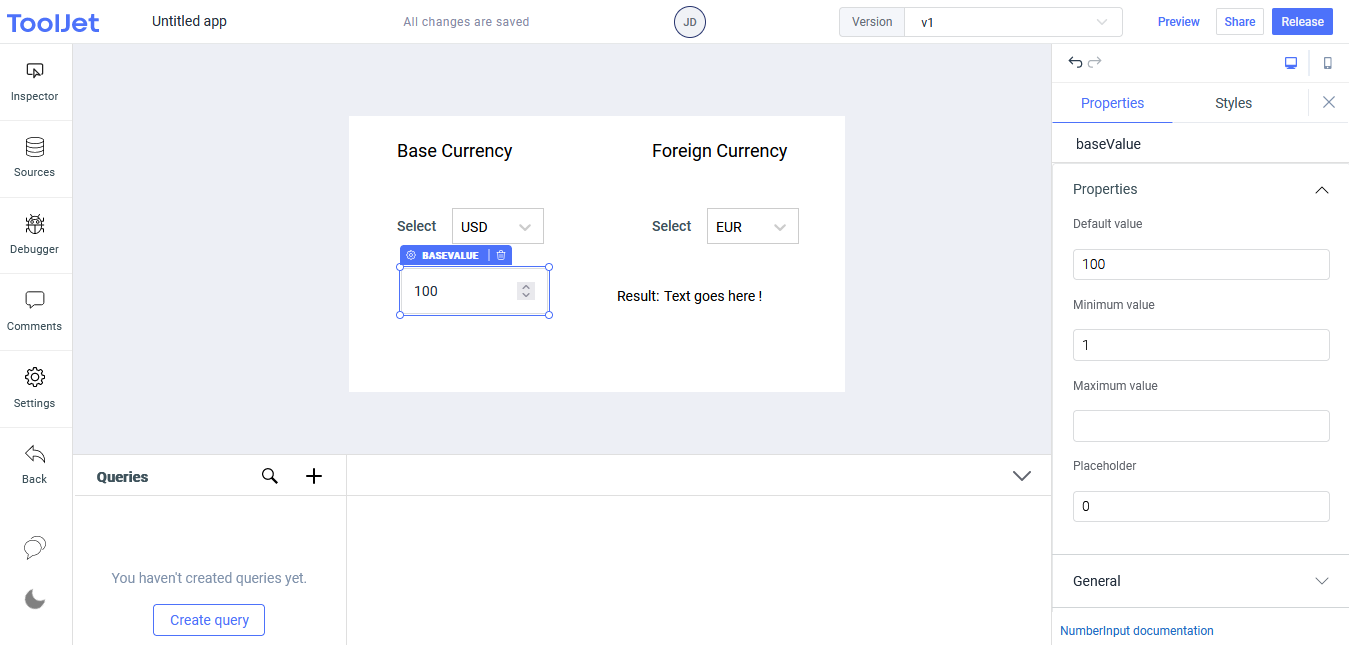
Next, we'll add a number input component, and rename the class to baseValue, the default value will be 100, minimum value 1, and the placeholder 0. This is the input value that will hold the amount to be converted.
For the result of the conversion, we’ll add a text component. The default value (value before conversion) will be 0, on the text, we’ll write a simple ternary expression.
{{typeof queries.convert.data == "object" ? 0 : queries.convert.data}}
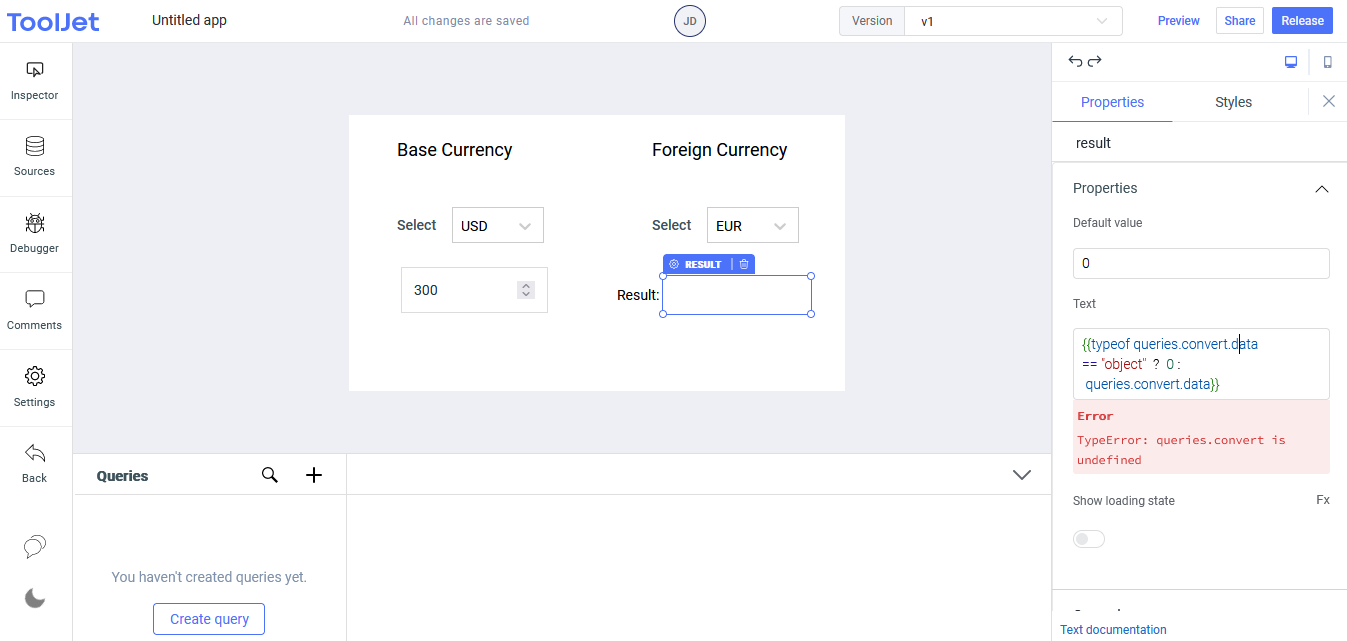
This expression is simply checking if the queries.convert.data is an object, if it is, return 0, and if not, return whatever value has been converted. Right now when we add this code, it will throw an error because we haven’t defined it yet. We’ll do that when we start writing our code.
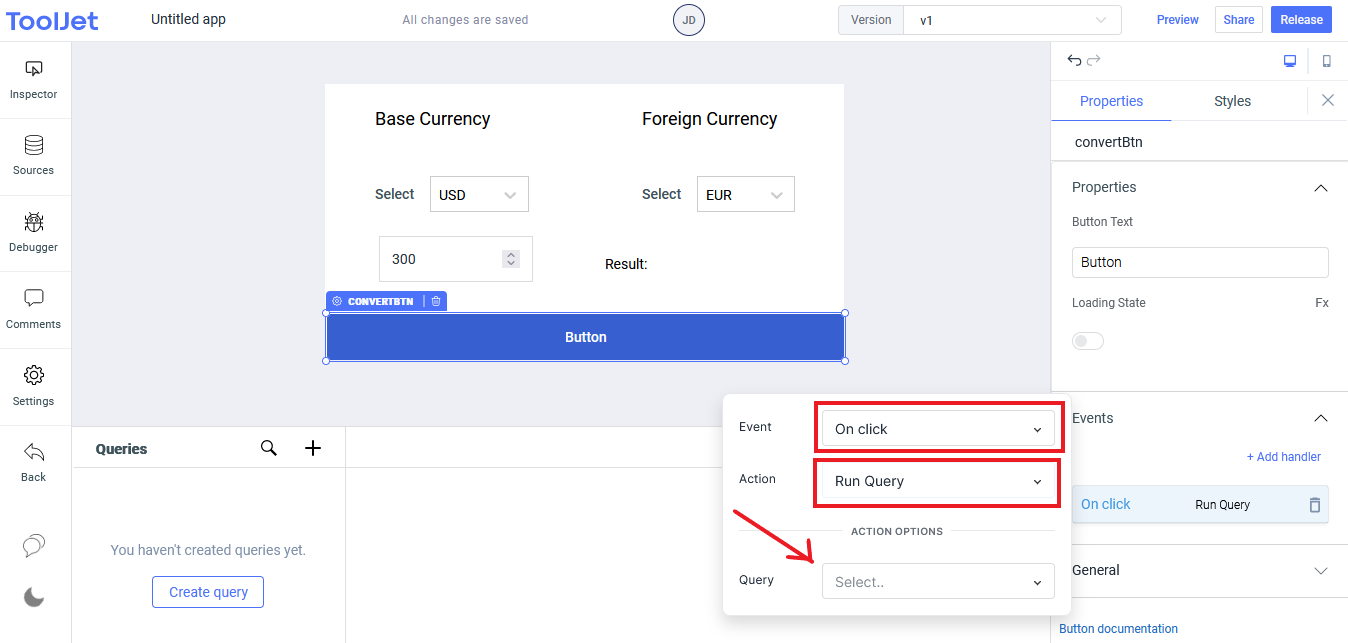
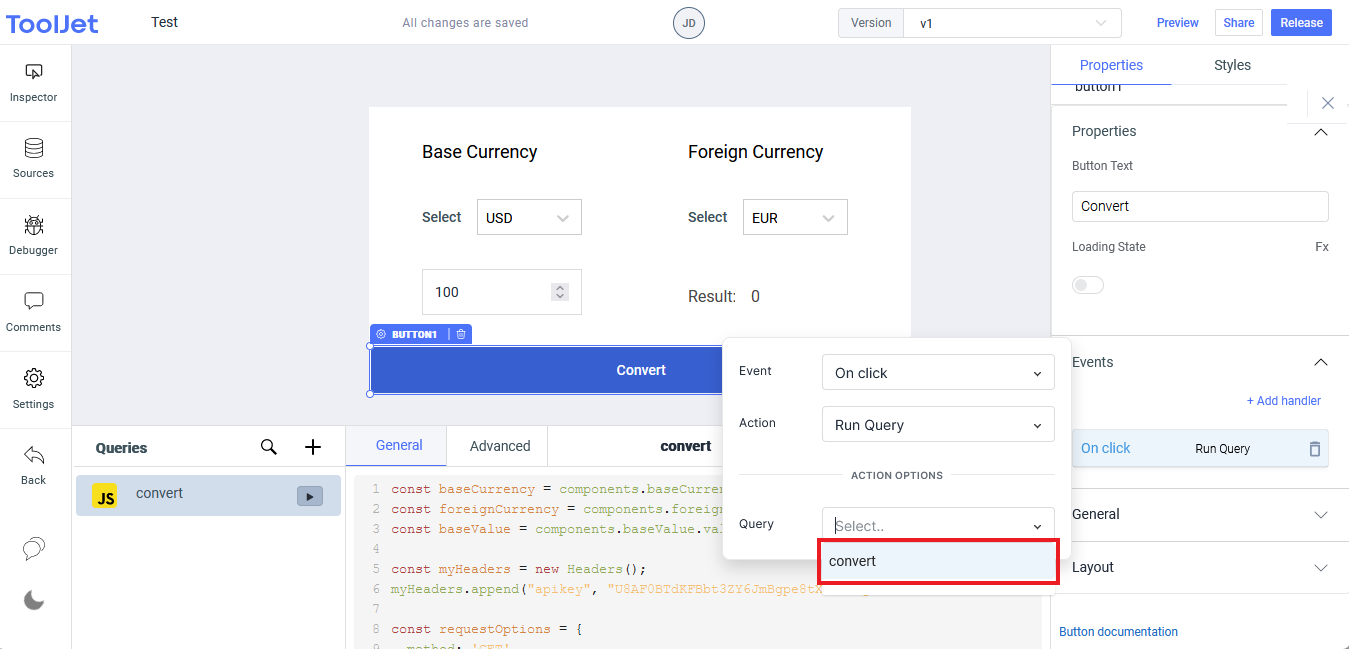
The next and final component is the button component, we will use this to trigger the event that will run our JavaScript code. Add the button component, and rename the class name to convertBtn. Click Events > Add Handler, on the modal, we have three options, the first is set to On Click which means the event will be triggered when clicked, for the Action, select Run Query. Since we haven’t created any new query, we’ll leave it blank, once we finish writing our code, we’ll come back to add it.
Step 4. Building Queries
We’ve successfully added and customized our components, next step is building a query to connect these components with our custom JavaScript code. At the bottom of the page, you’ll see the query section, click on the + icon of the query editor to create a new query.
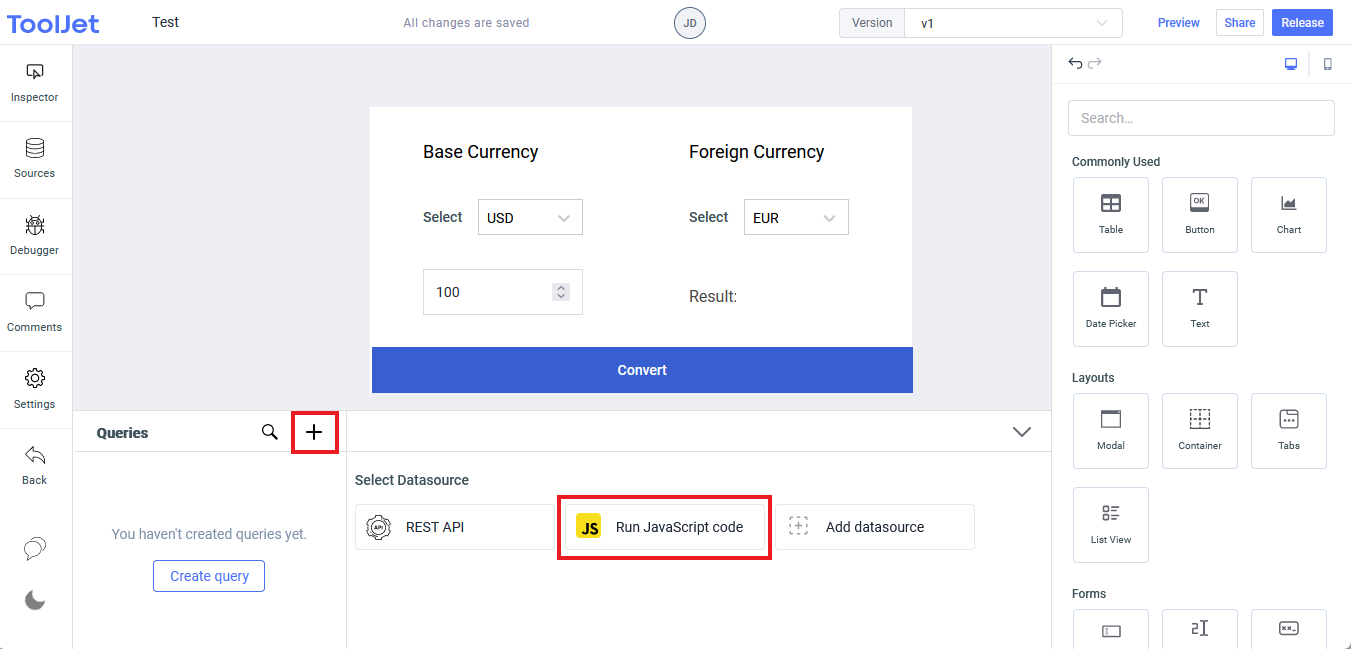
Select Run JavaScript code from the data source, after clicking the JavaScript code, it will open up an editor where we can write our custom code.
The following is an example of what our code should look like.
const baseCurrency = components.baseCurrency.value;
const foreignCurrency = components.foreignCurrency.value;
const baseValue = components.baseValue.value;

const myHeaders = new Headers();
myHeaders.append("apikey", "Fxxxxxxxxxxxxxxxxxxxxxxxxx");

const requestOptions = {
  method: 'GET',
  redirect: 'follow',
  headers: myHeaders
};

const res = await fetch(`https://api.apilayer.com/currency_data/convert?to=${foreignCurrency}&from=${baseCurrency}&amount=${baseValue}`, requestOptions)
const data = await res.json()
console.log(data.result);
return data.result.toFixed(2)
Code Overview
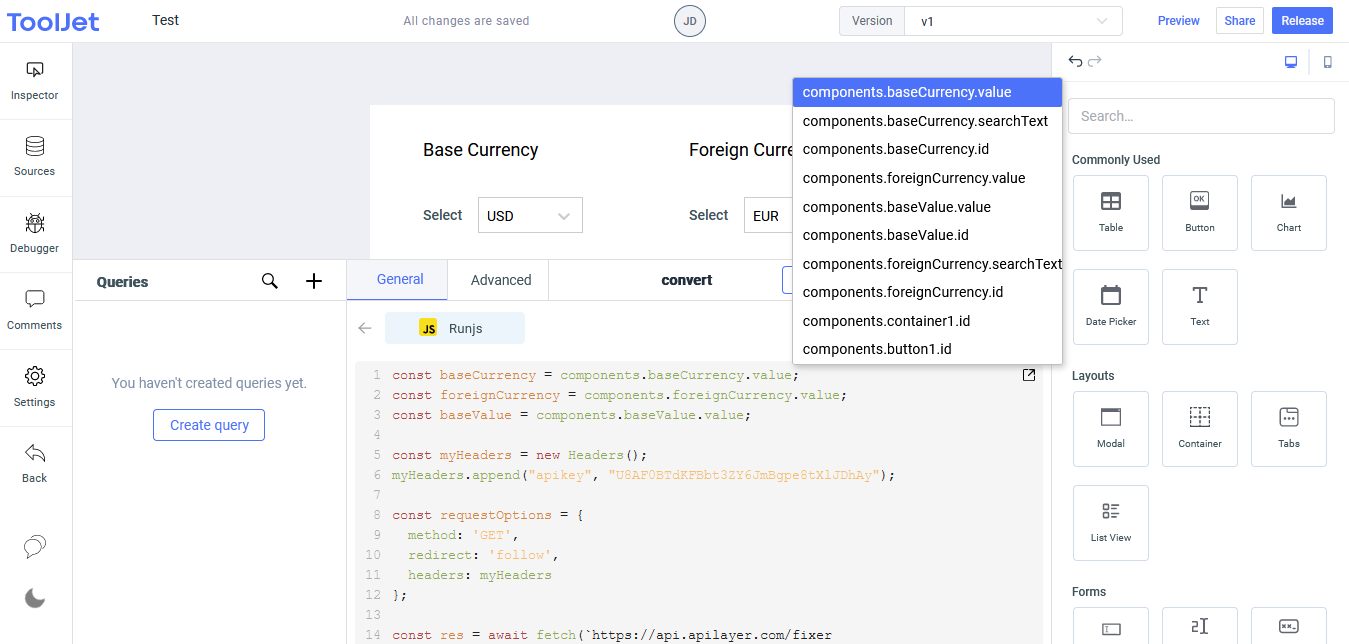
ToolJet offers us a unique object syntax for interacting with our code. For example. components.foreignCurrency.value; will get the value of the foreign currency component, and components.foreignCurrency.value; for the foreign currency, ETC.
Once we’re done writing the code, we can rename it if we want, I’ll name mine “convert”, and click create button to save it. Now we can connect this query we created to the button as an event handler so when clicked, it will trigger our custom code.
Head back to the button component, select the properties and scroll down to the events property, On the query option, select the custom code we just created and that’s it.
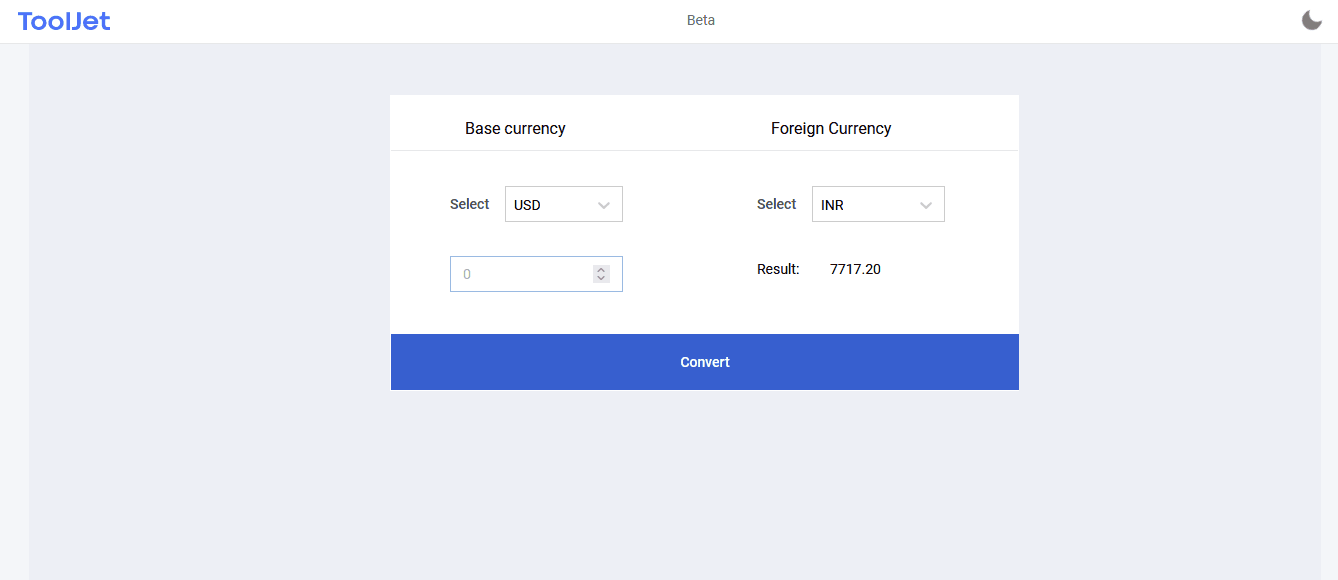
Here is the final result: https://app.tooljet.com/applications/eke-converter. You can test out this app we just created.
The sole purpose of this tutorial was to explain how to interact with components and queries using custom JavaScript, so understand you are not limited by this project and the API used, which has a rate limit of 100 requests per month.
Now we've understood how to interact with components and queries using vanilla JavaScript code, you can check out some of these articles on how to host a ToolJet app.
- How to configure and deploy ToolJet client on Vercel?
- How to Deploy ToolJet on Heroku
- How to Configure and Deploy ToolJet Client on Netlify
Finally
You have seen what is possible with ToolJet, it doesn’t take much to build an application, or create/customize a widget without writing much code. Thanks to their active open-source community, updates are being rolled out frequently, you can check out their repository if you want to contribute to the project or read the documentation.
I hope you enjoyed reading this article, if you did and will like to read more, follow me for similar content. Thanks for reading, and see you in another article. ✅


